Monday 28 November 2022

How to change the docker network default base?

sudo vim /etc/docker/daemon.json

old:-

{
    "default-runtime": "nvidia",
    "runtimes": {
        "nvidia": {
            "path": "nvidia-container-runtime",
            "runtimeArgs": []
        }
    }
}


new:-

{
    "bip": "192.168.1.1/24",
    "default-runtime": "nvidia",
    "runtimes": {
        "nvidia": {
            "path": "nvidia-container-runtime",
            "runtimeArgs": []
        }
    }
}


Sunday 27 November 2022

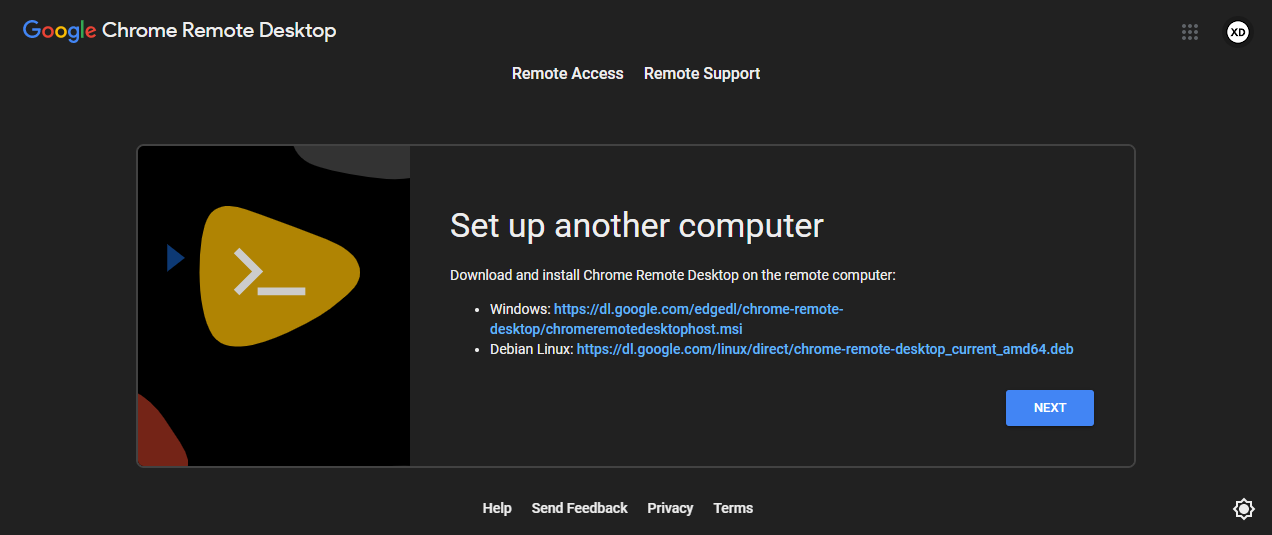
How to setup a remote desktop using google chrome with headless PC?


ref: https://bytexd.com/install-chrome-remote-desktop-headless/


  • Update the package index and install wget
    sudo apt update
    sudo apt-get install -y wget
  • Download the Debian Linux Chrome Remote Desktop installation package
    sudo wget https://dl.google.com/linux/direct/chrome-remote-desktop_current_amd64.deb
  • Install the package you just downloaded and its dependencies
    sudo dpkg --install chrome-remote-desktop_current_amd64.deb
    sudo apt install -y --fix-broken
  • In your SSH session install XFCE by running the following command:
    sudo DEBIAN_FRONTEND=noninteractive apt install -y xfce4 desktop-base
  • Configure Chrome Remote Desktop to use XFCE by default:The
    DEBIAN_FRONTEND=noninteractive
    parameter suppresses a prompt that would have asked you to configure the keyboard layout.
    sudo bash -c 'echo "exec /etc/X11/Xsession /usr/bin/xfce4-session" > /etc/chrome-remote-desktop-session'
  • XFCE’s default screen locker, called Light Locker, doesn’t work well with Chrome Remote Desktop. The screen goes blank and can’t be unlocked. We’ll install XScreenSaver as an alternative:
    sudo apt install -y xscreensaver
  • in your SSH session run the following command to add your user to the chrome-remote-desktop group:
    sudo usermod -a -G chrome-remote-desktop $USER
  • On your local computer, using your Google Chrome browser, go to the remote desktop command line setup page: https://remotedesktop.google.com/headless


  • The code looks something like:
    DISPLAY= /opt/google/chrome-remote-desktop/start-host \
    --code="4/xxxxxxxxxxxxxxxxxxxxxxxx" \
    --redirect-url="https://remotedesktop.google.com/_/oauthredirect" \
    --name=
  • Run the command in your SSH window.
    • If you’re prompted to enter a name for the computer, you can enter anything you like
    • When prompted to enter a PIN with at least 6 digits, enter any PIN you’d like to use. You’ll use this PIN as a password when connecting to the remote desktop in Google Chrome.

    Here is the command I ran:

    DISPLAY= /opt/google/chrome-remote-desktop/start-host --code="4/0AY0e-g5vJrJF7iw3I9Kc5tO8KFRZ3GPfKBPP61at LWvyczaP0sF9mhX4BizyZmICAUR7yg" --redirect-url="https://remotedesktop.google.com/_/oauthredirect" --name=$(hostname)

    Here is my output:

    Enter a PIN of at least six digits:
    Enter the same PIN again:

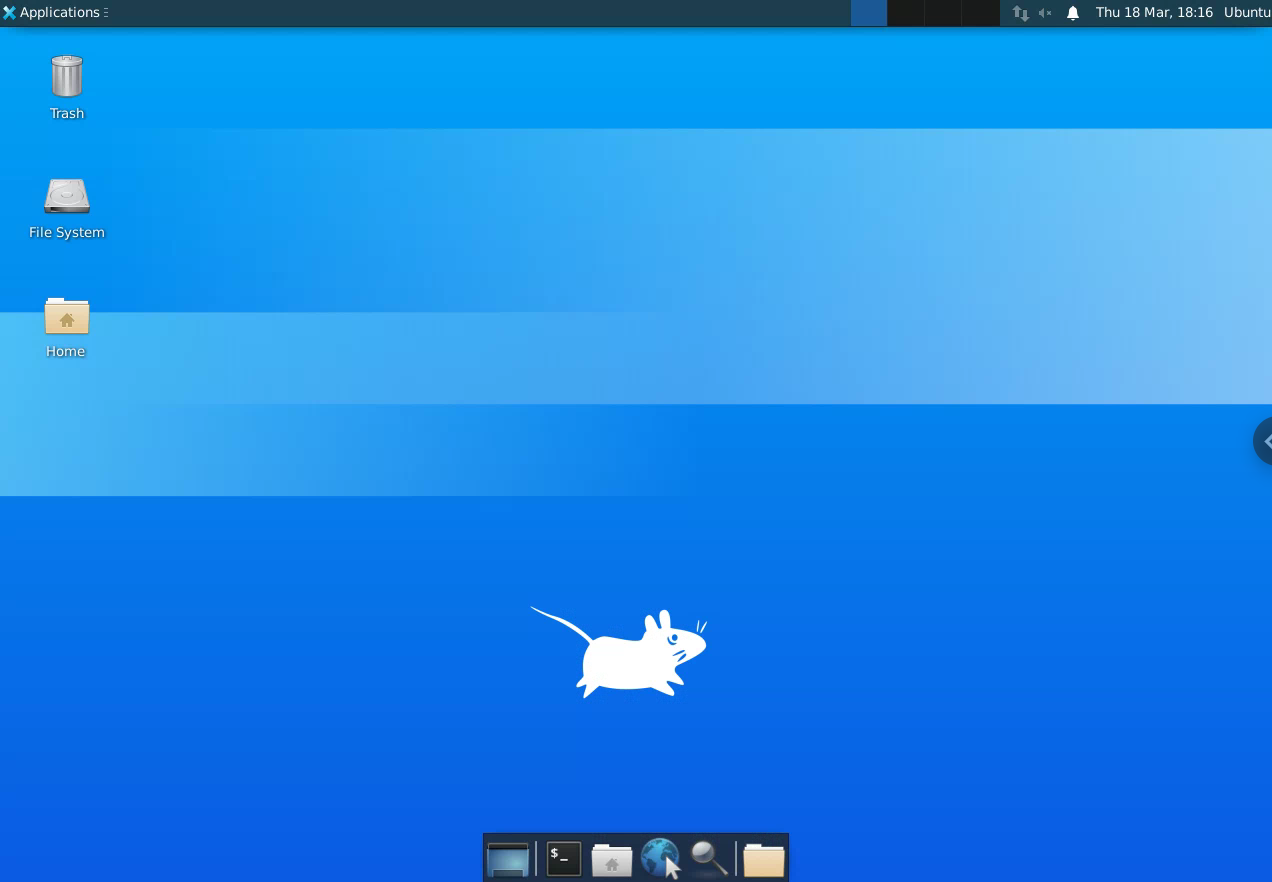
  • On your local computer visit the Chrome Remote Desktop website.If the setup worked, then you should see your Ubuntu 22.04/20.04 machine’s name listed in the Remote devices section of the page.I have a remote server with the hostname rdp that I created for this tutorial. Here is how the page looks like to me:


  • How to setup a dummy display in ubuntu?

    ref: https://techoverflow.net/2019/02/23/how-to-run-x-server-using-xserver-xorg-video-dummy-driver-on-ubuntu/

    https://tecadmin.net/how-to-install-xrdp-on-ubuntu-20-04/

    http://cosmolinux.no-ip.org/raconetlinux2/vnc.html

    https://support.anydesk.com/zh-cn/knowledge/command-line-interface-for-linux


    to setup the dummy display:-
    sudo apt install xserver-xorg-video-dummy

    save the following lines as dummy-1080.conf
     Section "Monitor"
      Identifier "Monitor0"
      HorizSync 28.0-80.0
      VertRefresh 48.0-75.0
      # https://arachnoid.com/modelines/
      # 1920x1080 @ 60.00 Hz (GTF) hsync: 67.08 kHz; pclk: 172.80 MHz
      Modeline "1920x1080_60.00" 172.80 1920 2040 2248 2576 1080 1081 1084 1118 -HSync +Vsync
    EndSection

    Section "Device"
      Identifier "Card0"
      Driver "dummy"
      VideoRam 256000
    EndSection

    Section "Screen"
      DefaultDepth 24
      Identifier "Screen0"
      Device "Card0"
      Monitor "Monitor0"
      SubSection "Display"
        Depth 24
        Modes "1920x1080_60.00"
      EndSubSection
    EndSection

    to run the dummy display:-
    sudo X -config dummy-1920x1080.conf

    to start a program in a display:-
    DISPLAY=:0 firefox

    to start a program in a specific display:-
    sudo X :7 -config dummy-1920x1080.conf
    DISPLAY=:7 firefox
    (you will see error if other display already used that number)

    to stop the current display service:-
    sudo service gdm stop
    sudo service lightdm stop

    to get the list of current display:-
    ps aux | grep Xorg

    Thursday 24 November 2022

    Tuesday 22 November 2022

    How to unblock ip from SSH in ubuntu? connection refused?

    https://seanelvidge.com/unblock-ip-address-from-connecting-via-ssh/


    sudo iptables -L --line-numbers

    sudo iptables -D f2b-sshd 2

    (number 2 means the second item under f2b-sshd, change it accordingly)

    sudo iptables-save

    Wednesday 16 November 2022

    How to install conda and environment inside a Dockerfile?

    step1 - Dockerfile:-

    FROM xxx/client_xxx


    #

    # Install Miniconda in /opt/conda

    #


    ENV PATH /opt/conda/bin:$PATH


    RUN apt-get update --fix-missing && \

        apt-get install -y wget bzip2 ca-certificates curl git && \

        apt-get clean && \

        rm -rf /var/lib/apt/lists/*


    RUN wget --quiet https://repo.anaconda.com/miniconda/Miniconda3-py39_4.11.0-Linux-x86_64.sh -O ~/miniconda.sh && \

        /bin/bash ~/miniconda.sh -b -p /opt/conda && \

        rm ~/miniconda.sh && \

        /opt/conda/bin/conda clean -tipsy && \

        ln -s /opt/conda/etc/profile.d/conda.sh /etc/profile.d/conda.sh && \

        echo ". /opt/conda/etc/profile.d/conda.sh" >> ~/.bashrc && \

        echo "conda activate base" >> ~/.bashrc


    ENV PATH /opt/conda/bin:$PATH

    ENV LD_LIBRARY_PATH /usr/local/cuda-11.1/lib64:/usr/local/cuda-11.1/extras/CUPTI/lib64:$LD_LIBRARY_PATH


    step1 - build.sh:-

    docker build . -t hello:world


    step2 - Dockerfile:-

    FROM hello:world


    #

    # create conda environment

    #

    COPY env.yml .

    RUN conda env create -f env.yml

    RUN echo "completed setup conda..."


    #

    # copy the source code

    #

    WORKDIR /data

    COPY code ./code


    ENV PATH /opt/conda/bin:$PATH

    ENV LD_LIBRARY_PATH /usr/local/cuda-11.1/lib64:/usr/local/cuda-11.1/extras/CUPTI/lib64:$LD_LIBRARY_PATH


    # Override default shell and use bash

    WORKDIR /data/code


    step2 - build.sh:-

    docker build . -t hello:world


    step3 - inside docker, put a run.sh:-

    eval "$(conda shell.bash hook)"

    conda activate ninja

    cd /data/code

    python main.py

    conda deactivate


    reference:-
    https://pythonspeed.com/articles/activate-conda-dockerfile/

    Tuesday 15 November 2022

    How to check nvidia-smi processes still alive or not?

    #!/bin/bash

    total=1 base=1 counter=0 sub='/hello/world/main' TEMPFILE=/tmp/$$.tmp nvidia-smi --query-compute-apps=gpu_bus_id,pid,process_name,used_memory --format=csv,noheader,nounits | while read line; do if [[ "$line" == *"$sub"* ]]; then $((counter = counter+1)) echo $counter > $TEMPFILE echo "$line, cc: $counter" fi done echo $(cat $TEMPFILE) if [ "$(cat $TEMPFILE)" -le "$total" ]; then docker stop ninja_server docker rm ninja_server docker stop ninja_client docker rm ninja_client fi

    Monday 14 November 2022

    How to run anaconda in a bash script?

    example1:-

    export PATH="/home/ninja/anaconda3/bin/:$PATH"
    eval "$(conda shell.bash hook)" conda activate vauienv cd /home/ninja/helloworld
    pwd python main.py conda deactivate

    example2, to include the PID and check every minute in crontab

    export PATH="/home/ninja/anaconda3/bin/:$PATH"
    eval "$(conda shell.bash hook)"
    conda activate triton cd /home/ninja/code TMP="/home/ninja/app.pid" PID="cat $TMP" if ! ps -p $PID > /dev/null then rm $TMP python test.py & echo $! >> $TMP fi conda deactivate 

    Tuesday 1 November 2022

    Tritonserver Version vs Ubuntu Version

     tritonserver:22.05-py3 for ubuntu20, nvidia driver 510 and above


    tritonserver:21.10-py3 for ubuntu18, nvidia driver 470 and above