p/s: copied from https://ccit.college.columbia.edu/knowledgebase/article/how-map-network-drives-windows-10
Press Windows key to open Search. Type This PC into the Search.
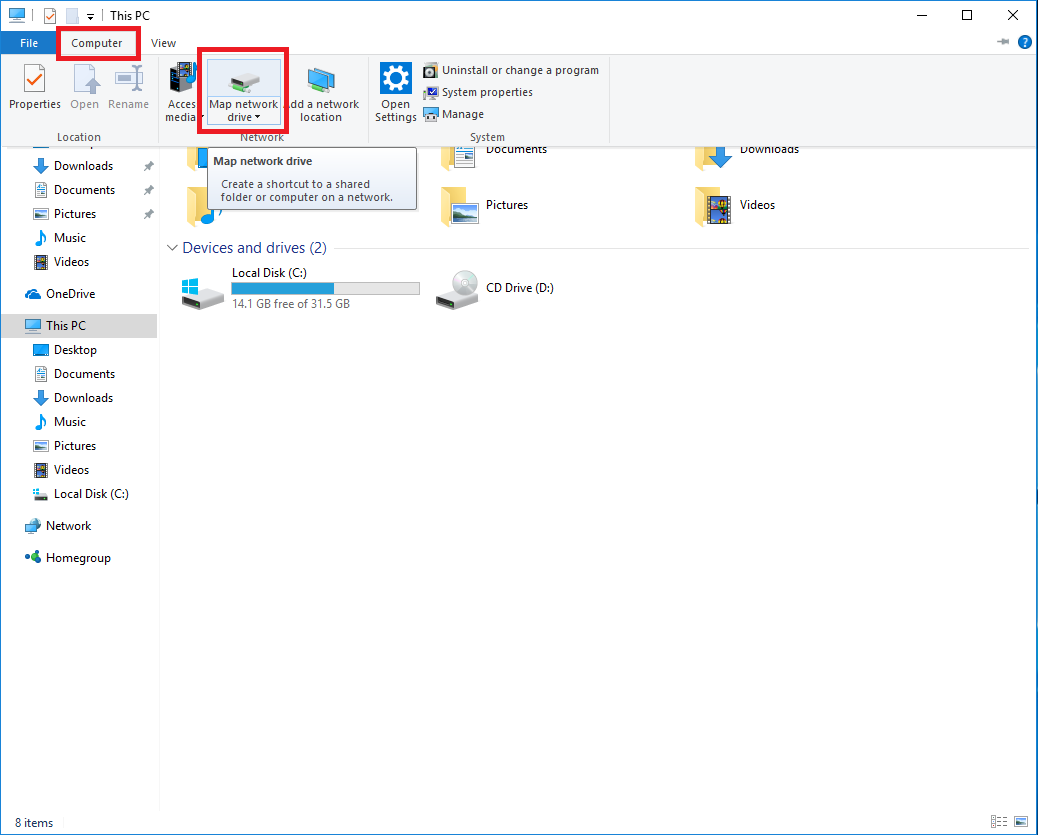
Click Computer at the top. Select Map network drive.

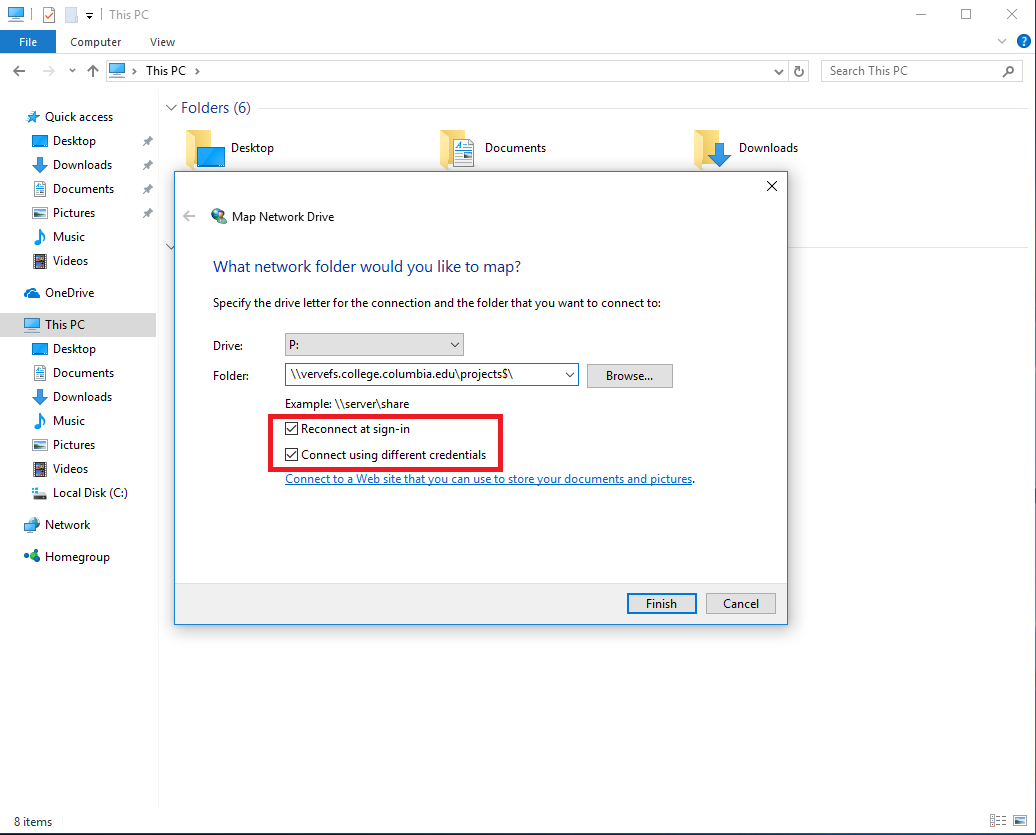
In the Map Network Drive window choose which Drive Letter you wish to assign to the Network Drive you're currently mapping. In the Folder field, enter the full network path you wish to map (this path should be provided to you by your CC sponsor or CCIT personnel). As shown in the screen shot below, be sure to check the boxes for Reconnect at sign-in and Connect using different credentials. When all fields are filled out, click Finish
For Columbia College Staff, the most commonly used shared drives have the following addresses:

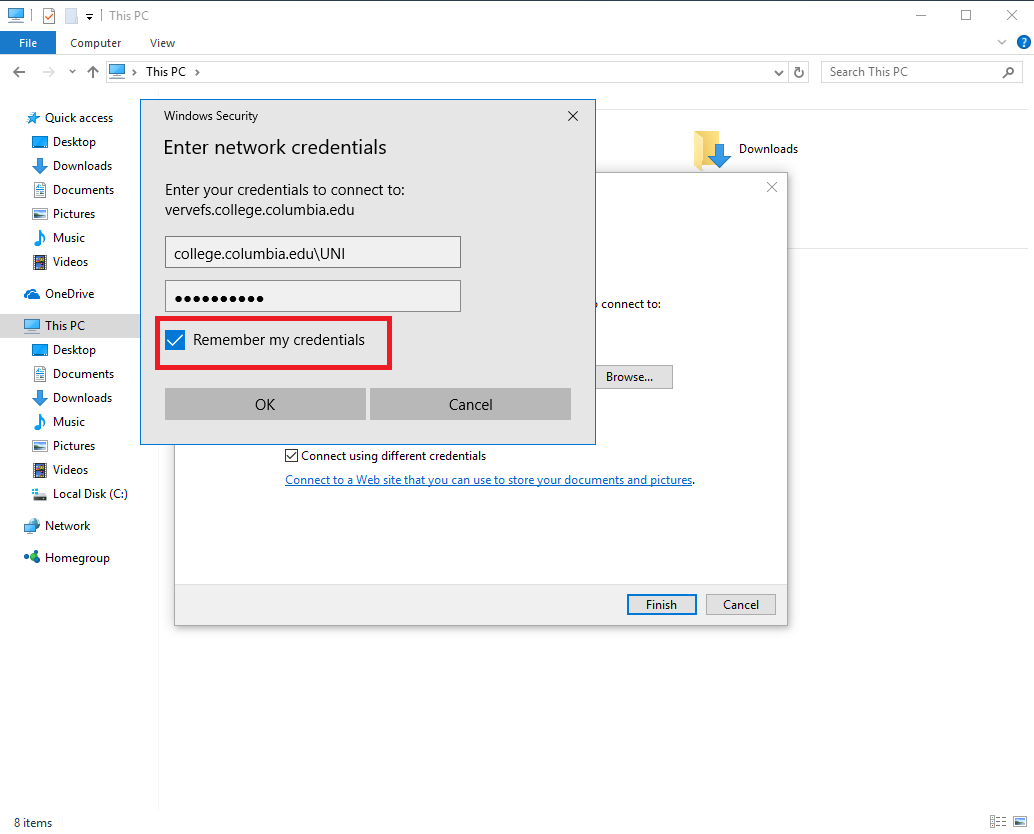
You'll be asked to enter a set of credentials to access the Network share you're trying to map. At this time, enter your COLLEGE login credentials. Be sure to enter the full domain path before your UNI, as shown in the screen shot below. Check the box Remember my credentials, then click OK.

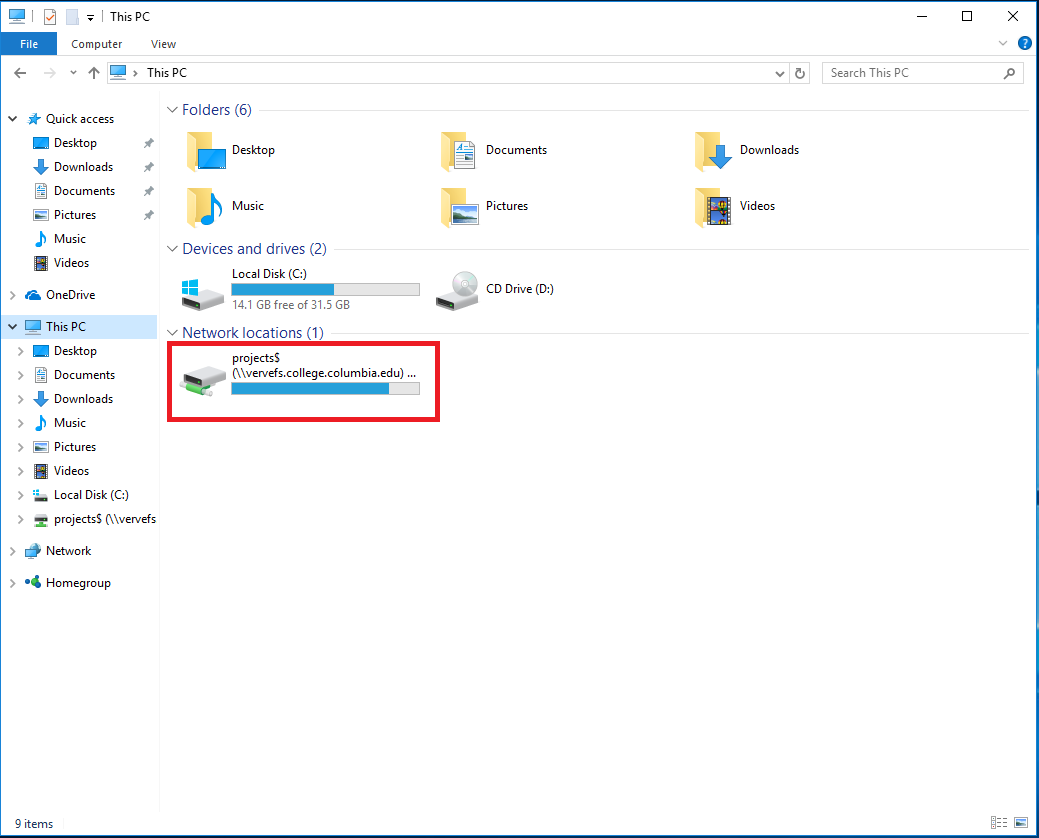
When completed the Network share should be mapped for you and will be accessible from the This PC window.

No comments:
Post a Comment