Monday, 30 March 2020

how to create virtual environment without conda?

python -m pip install --user virtualenv
 
cd to install location path of env
 
python -m virtualenv env 

source env/bin/activate

libgflags.a(gflags.cc.o): relocation R_X86_64_32S make pycaffe

gflags is not compiled as a shared library by default; make sure it is compiled as a shared library:
 
cd gflags/build
cmake .. -DBUILD_SHARED_LIBS=ON
make -j32
sudo make -j32 install
 
After that glog compiles fine against gflags.

Monday, 16 March 2020

How to calculate fps from elapsed time?

p/s: copy from https://stackoverflow.com/questions/43761004/fps-how-to-divide-count-by-time-function-to-determine-fps
  • Here is a very simple way to print your program's frame rate at each frame (no counter needed) :
    import time
    
    while True:
        start_time = time.time() # start time of the loop
    
        ########################
        # your fancy code here #
        ########################
    
        print("FPS: ", 1.0 / (time.time() - start_time)) # FPS = 1 / time to process loop
     
  • If you want the average frame rate over x seconds, you can do like so (counter needed) :
    import time
    
    start_time = time.time()
    x = 1 # displays the frame rate every 1 second
    counter = 0
    while True:
    
        ########################
        # your fancy code here #
        ########################
    
        counter+=1
        if (time.time() - start_time) > x :
            print("FPS: ", counter / (time.time() - start_time))
            counter = 0
            start_time = time.time()
Hope it helps!

Wednesday, 11 March 2020

cannot find -lboost_python3

cd /usr/lib/x86_64-linux-gpu

sudo ln -s libboost_python-py35.so libboost_python3.so

cannot find -lboost_python3

cd /usr/lib/x86_64-linux-gpu

sudo ln -s libboost_python-py35.so libboost_python3.so

Tuesday, 10 March 2020

How to check system specifications in Ubuntu Server 16.04 with the CLI

p/s: copy from https://ourcodeworld.com/articles/read/768/how-to-check-system-specifications-in-ubuntu-server-16-04-with-the-cli


$sudo apt-get install hardinfo


or


1. Install lshw (HardWare LiSter for Linux)

lshw is a small tool to provide detailed information on the hardware configuration of the machine. It can report exact memory configuration, firmware version, mainboard configuration, CPU version and speed, cache configuration, bus speed, etc. on DMI-capable x86 or EFI (IA-64) systems and on some ARM and PowerPC machines (PowerMac G4 is known to work). The information can be output in plain text, XML or HTML. It currently supports DMI (x86 and EFI only), OpenFirmware device tree (PowerPC only), PCI/AGP, ISA PnP (x86), CPUID (x86), IDE/ATA/ATAPI, PCMCIA (only tested on x86), USB and SCSI.
To install this package on your ubuntu system, run the following command:
sudo apt-get install lshw
After the installation you will be able to list all the specifications of your server eitherin HTML format or plain text. For more information about this project, visit the official repository here.

2. Generate inline short specs list

The prefered way for almost every user of this tool, is a short list with the description and values of the components of our interest, namely the processor, RAM, storage capacity and network information. lshw allows you to see such description with the following command:
sudo lshw -short
That will generate an output similar to:
H/W path        Device     Class       Description
==================================================
                           system      VirtualBox
/0                         bus         VirtualBox
/0/0                       memory      128KiB BIOS
/0/1                       memory      1999MiB System memory
/0/2                       processor   Intel(R) Core(TM) i7-3770 CPU @ 3.40GHz
/0/100                     bridge      440FX - 82441FX PMC [Natoma]
/0/100/1                   bridge      82371SB PIIX3 ISA [Natoma/Triton II]
/0/100/1.1                 storage     82371AB/EB/MB PIIX4 IDE
/0/100/2                   display     VirtualBox Graphics Adapter
/0/100/3        eth0       network     82540EM Gigabit Ethernet Controller
/0/100/4                   generic     VirtualBox Guest Service
/0/100/5                   multimedia  82801AA AC'97 Audio Controller
/0/100/7                   bridge      82371AB/EB/MB PIIX4 ACPI
/0/100/8        eth1       network     82540EM Gigabit Ethernet Controller
/0/100/d                   storage     82801HM/HEM (ICH8M/ICH8M-E) SATA Controll
/0/3            scsi2      storage
/0/3/0.0.0      /dev/sda   disk        68GB VBOX HARDDISK
/0/3/0.0.0/1    /dev/sda1  volume      487MiB Linux filesystem partition
/0/3/0.0.0/2    /dev/sda2  volume      63GiB Extended partition
/0/3/0.0.0/2/5  /dev/sda5  volume      63GiB Linux LVM Physical Volume partition

3. Generate general specs list as HTML

If for you isn't enough a short description on the CLI, lshw is able to generate an HTML based report with the a detailed description of all the components of your ubuntu based server, just set the output format to html and pipe its content into a HTML file:
sudo lshw -html > server_specs.html
The content of the server_specs.html file will then look something like:
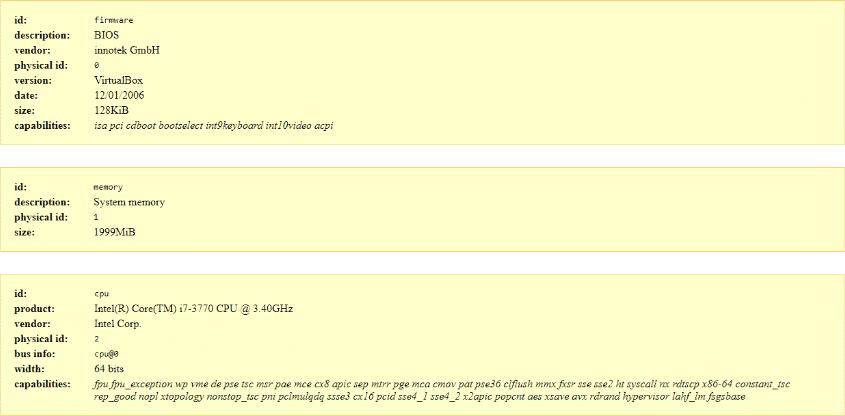
Ubunto Detailed Specs on HTML
This option is pretty useful when you have to provide a detailed description for someone that doesn't have access to the server. You can simply print the file or send it to someone else.

4. Generate specific component description

If you want detailed description about a specific component of your system, simply filter the output specifyng the component that you want with the -c argument:
sudo lshw -C [component name]
For example:

Network

To display information about the network interface use:
sudo lshw -C network
This will generate an output similar to:
*-network:0
    description: Ethernet interface
    product: 82540EM Gigabit Ethernet Controller
    vendor: Intel Corporation
    physical id: 3
    bus info: pci@0000:00:03.0
    logical name: eth0
    version: 02
    serial: 08:00:27:e8:bf:1b
    size: 1Gbit/s
    capacity: 1Gbit/s
    width: 32 bits
    clock: 66MHz
    capabilities: pm pcix bus_master cap_list ethernet physical tp 10bt 10bt-                                          fd 100bt 100bt-fd 1000bt-fd autonegotiation
    configuration: autonegotiation=on broadcast=yes driver=e1000 driverversio                                          n=7.3.21-k8-NAPI duplex=full ip=10.0.2.15 latency=64 link=yes mingnt=255 multica                                          st=yes port=twisted pair speed=1Gbit/s
    resources: irq:19 memory:f0000000-f001ffff ioport:d010(size=8)
*-network:1
    description: Ethernet interface
    product: 82540EM Gigabit Ethernet Controller
    vendor: Intel Corporation
    physical id: 8
    bus info: pci@0000:00:08.0
    logical name: eth1
    version: 02
    serial: 08:00:27:69:a2:01
    size: 1Gbit/s
    capacity: 1Gbit/s
    width: 32 bits
    clock: 66MHz
    capabilities: pm pcix bus_master cap_list ethernet physical tp 10bt 10bt-                                          fd 100bt 100bt-fd 1000bt-fd autonegotiation
    configuration: autonegotiation=on broadcast=yes driver=e1000 driverversio                                          n=7.3.21-k8-NAPI duplex=full ip=192.168.33.10 latency=64 link=yes mingnt=255 mul                                          ticast=yes port=twisted pair speed=1Gbit/s
    resources: irq:16 memory:f0820000-f083ffff ioport:d240(size=8)

Storage (partitions)

To display information about the storage capacity and partitions in your system use:
sudo lshw -C volume
This will generate an output similar to:
*-volume:0
    description: Linux filesystem partition
    vendor: Linux
    physical id: 1
    bus info: scsi@2:0.0.0,1
    logical name: /dev/sda1
    logical name: /boot
    version: 1.0
    serial: 9ff6ec2f-4052-4861-a546-f31e7a95c11b
    size: 487MiB
    capacity: 487MiB
    capabilities: primary bootable extended_attributes large_files ext2 initialized
    configuration: filesystem=ext2 lastmountpoint=/boot modified=2018-07-01 19:24:44 mount.fstype=ext2 mount.options=rw,relatime,block_validity,barrier,user_xattr,acl mounted=2018-07-01 19:24:44 state=mounted
*-volume:1
    description: Extended partition
    physical id: 2
    bus info: scsi@2:0.0.0,2
    logical name: /dev/sda2
    size: 63GiB
    capacity: 63GiB
    capabilities: primary extended partitioned partitioned:extended
    *-logicalvolume
        description: Linux LVM Physical Volume partition
        physical id: 5
        logical name: /dev/sda5
        serial: eSLg7t-nBsZ-fJT4-gDq4-s70Z-1Cg5-rIwDUX
        size: 63GiB
        capacity: 63GiB
        capabilities: multi lvm2

Processor

To display information about the processor use:
sudo lshw -C processor
This will generate an output similar to:
*-cpu
    product: Intel(R) Core(TM) i7-3770 CPU @ 3.40GHz
    vendor: Intel Corp.
    physical id: 2
    bus info: cpu@0
    width: 64 bits
    capabilities: fpu fpu_exception wp vme de pse tsc msr pae mce cx8 apic sep mtrr pge mca cmov pat pse36 clflush mmx fxsr sse sse2 ht syscall nx rdtscp x86-64 constant_tsc rep_good nopl xtopology nonstop_tsc pni pclmulqdq ssse3 cx16 pcid sse4_1 sse4_2 x2apic popcnt aes xsave avx rdrand hypervisor lahf_lm fsgsbase

Sound

To display information about the sound card use:
sudo lshw -C sound
This will generate an output similar to:
*-multimedia
    description: Multimedia audio controller
    product: 82801AA AC'97 Audio Controller
    vendor: Intel Corporation
    physical id: 5
    bus info: pci@0000:00:05.0
    version: 01
    width: 32 bits
    clock: 33MHz
    capabilities: bus_master
    configuration: driver=snd_intel8x0 latency=64
    resources: irq:21 ioport:d100(size=256) ioport:d200(size=64)

Memory

To display information about the RAM memory use:
sudo lshw -C memory
This will generate an output similar to:
*-firmware
    description: BIOS
    vendor: innotek GmbH
    physical id: 0
    version: VirtualBox
    date: 12/01/2006
    size: 128KiB
    capabilities: isa pci cdboot bootselect int9keyboard int10video acpi
*-memory
    description: System memory
    physical id: 1
    size: 1999MiB
As mentioned at the beginning of the article, lshw is a pretty nice utility with a lot of options, so you will be able to learn more about it in the man page for this tool as well.

RuntimeError: received 0 items of ancdata

set the ulimit to a higher number:-
ulimit -n 1048576

Tuesday, 3 March 2020

Ubuntu18.04下NNIE模型转换环境搭建

 p/s: https://blog.csdn.net/weixin_42464187/article/details/102955640

原创 秋夜魔法师 最后发布于2019-11-07 15:19:16 阅读数 242 收藏 展开

Ubuntu18.04下NNIE模型转换环境搭建

海思只给提供了一个模型转换工具nnie_mapper,是把caffe模型转为nnie硬件支持的.wk的压缩模型文件。模型的原始值是float32表示的,而用8bit量化得到的是用int8来量化存储的,所以一般来说.wk模型的大小只有原始模型的四分之一,但是我转的模型却没有变小,而是变大了一点。

因为海思并没有提供nnie_mapper的源码,所以我需要查看该执行文件依赖哪些动态库:readelf -d nnie_mapper_12来查看依赖哪些库,并对应Hisvp开发指南找到相应的版本。

安装gcc 4.8.5

GNU编译器集合(GCC)是C,C ++,Objective-C,Fortran,Ada,Go和D编程语言的编译器和库的集合。许多开源项目包括GNU工具和Linux内核都是用GCC编译的。

    Ubuntu 多版本 gcc 的安装和切换 参考:

    首先更新包列表:sudo apt update

    键入以下命令安装build-essential软件包:sudo apt install build-essential

    多版本安装:
        使用命令将ubuntu-toolchain-r/test PPA添加到您的系统:sudo apt install software-properties-common
        sudo add-apt-repository ppa:ubuntu-toolchain-r/test
        安装多个版本的GCC&G++: sudo apt install gcc-4.8 g+±4.8 gcc-7 g+±7 gcc-8 g+±8 gcc-9 g+±9
        默认版本是具有最高优先级的版本,在我们的例子中是gcc-4.8

    sudo update-alternatives --install /usr/bin/gcc gcc /usr/bin/gcc-4.8 48 --slave /usr/bin/g++ g++ /usr/bin/g++-4.8

    sudo update-alternatives --install /usr/bin/gcc gcc /usr/bin/gcc-8 80 --slave /usr/bin/g++ g++ /usr/bin/g++-8

    sudo update-alternatives --install /usr/bin/gcc gcc /usr/bin/gcc-9 90 --slave /usr/bin/g++ g++ /usr/bin/g++-9


        切换gcc 版本sudo update-alternatives --config gcc 选择4.8.5再进行后续编译操作

编译protobuf 3.5.1

下载地址:https://github.com/google/protobuf/releases 找3.5.1

编译安装:

    1.tar -xvf protobuf; cd protobuf
    2.autogen.sh
    3.configure -prefix=/you/want/to/install/
    4.make
    5.make check
    6.make install
    7.把lib路径加入到LD_LIBRARY_PATH中,把bin加到PATH中(通过编辑~/.bashrc即可)

编译 opencv 3.4.0

下载地址:
OpenCV - https://opencv.org/
opencv_contrib - github

安装依赖:

    sudo apt-get install build-essential
    sudo apt-get install cmake git libgtk2.0-dev pkg-config libavcodec-dev libavformat-dev libswscale-dev
    sudo apt-get install python-dev python-numpy libtbb2 libtbb-dev libjpeg-dev libtiff-dev libjasper-dev libdc1394-22-dev

编译安装:

    tar -xvzf opencv-3.4.0.tar.gz

    cd opencv-3.4.0

    安装opencv_contrib【如果编译过程出现问题就不编译opencv_contrib即可】
        mv …/opencv_contrib-3.4.0 ./

    mkdir build; mkdir install

    cmake -D CMAKE_BUILD_TYPE=RELEASE -D CMAKE_INSTALL_PREFIX=/x/x –D WITH_VTK=ON -D OPENCV_EXTRA_MODULES_PATH=/x/x/opencv_contrib-3.4.0/modules/ -D CUDA_NVCC_FLAGS="-std=c++11 --expt-relaxed-constexpr" -D WITH_NVCUVID=OFF -D BUILD_opencv_cudacodec=OFF -D ENABLE_CXX11=YES ..

    ..
        OPENCV_EXTRA_MODULES_PATH=你的opencv_contrib/modules的位置
        CMAKE_INSTALL_PREFIX=你想安装的位置
        cuda10以上没有dynlink_nvcuvid.h和nvcuvid.h,所以要将BUILD_opencv_cudacodec=OFF
        如果编译opencv-contrib需要下载boost之类的可以不编译这个,即去掉OPENCV_EXTRA_MODULES_PATH

    make

    make check

    make install

    CMAKE_INSTALL_PREFIX 中就是你需要的include lib bin

模型转换

注意 :
你的gcc的版本最好是4.8,我的是4.8.5,而且你的protobuf需要是在这个版本下编译的,否则会报错 undefined symbol: _ZN6google8protobuf8internal26fixed_address_empty_stringE

用命令:nm -s libprotobuf.so|grep _ZN6google8protobuf8internal26fixed_address_empty_stringE 会发现有这个符号,但是多了B5cxx11,这个是和编译程序的gcc程序有关系,由于protobuf的源码中含有c++程序,所以需要使用gcc4.8.5和g++4.8.5来编译protobuf才行。

模型转换命令:

nnie_mapper_12 model.cfg


model.cfg 文件介绍:

[prototxt_file]  model.prototxt          # caffe 的prototxt 
[caffemodel_file] model.caffemodel       # caffe 的model文件
[batch_num] 1                            # [单张模式/多张模式]
[net_type] 0                            
[sparse_rate] 0                          # 0 - 不稀疏处理 0.5 - 0.5稀疏
[compile_mode] 1                         # 0 - 高速模式损失精度 1 - 高精度模式
[is_simulation] 0                        # 0 - 芯片模式 1 - 仿真模式用于pc端
[log_level] 2
[instruction_name] save_model   # 存储的NNIE模型文件名
[image_list] ./file_list.txt    # 用于存储数据的决定路径,30张左右的样例数据用于量化模型
[image_type] 1           # 1 - 表示网络数据输入为 SVP_BLOB_TYPE_U8(普通的灰度图和RGB图)类型; 此时要求 image_list 配置是 RGB 图或者灰度图片的 list 文件;
[mean_file] ./mean.txt   # 均值文件,用于数据的标准化,每行代表一个通道要减去的值
[norm_type] 5            # 0 - 不做预处理 5 - 减通道均值后再乘以 data_scale
[RGB_order] BGR
[data_scale] 1           # 0.00390625 = 1/ 256;1 就是不缩放
[internal_stride] 16  # 数据的维度必须是16的倍数,否则按16的倍数补全,默认为16,修改无效


参考

[1] 海思AI芯片:https://blog.csdn.net/avideointerfaces/article/details/100178343
[2] 多版本GCC安装:https://www.linuxidc.com/Linux/2019-06/159059.htm
————————————————
版权声明:本文为CSDN博主「秋夜魔法师」的原创文章,遵循 CC 4.0 BY-SA 版权协议,转载请附上原文出处链接及本声明。
原文链接:https://blog.csdn.net/weixin_42464187/article/details/102955640

How to edit and compile *.cpp code in ubuntu? Codeblocks!

p/s: from https://www.linuxbabe.com/ubuntu/install-code-blocks-ubuntu-16-04-17-04

tutorial: https://www3.ntu.edu.sg/home/ehchua/programming/howto/CodeBlocks_HowTo.html

This tutorial will be showing you how to install Code Blocks on Ubuntu 16.04/Ubuntu 18.04, 19.04Code Blocks is a free, open-source integrated development environment (IDE) for C, C++ and Fortran. It can run on Linux, Mac, Windows. The latest version, Code Blocks 17.12, was released on December, 2017.
Code Blocks features:
  • Supports multiple compilers including GCC, Clang, Visual C++, MinGW and many more
  • Custom build system and optional Make support.
  • Syntax highlighting and code folding
  • C++ code completion, class browser, a hex editor
  • A debugger with full breakpoint support
  • A plug-in system to support other programming languages.
  • And more

How to Install Code Blocks IDE on Ubuntu 16.04/Ubuntu 18.04, 19.04

Code Blocks is in the default Ubuntu package repository, so you can open up a terminal window and run the following command to install it.
sudo apt install codeblocks
However, Ubuntu repository only contains the outdated version (Code Blocks 16.01). To install the latest version, download the latest version.
64 bit
wget http://sourceforge.net/projects/codeblocks/files/Binaries/17.12/Linux/Debian%20stable/codeblocks_17.12-1_amd64_stable.tar.xz
32 bit
wget http://sourceforge.net/projects/codeblocks/files/Binaries/17.12/Linux/Debian%20stable/codeblocks_17.12-1_i386_stable.tar.xz
Extract the tarball.
64 bit
sudo tar xvf codeblocks_17.12-1_amd64_stable.tar.xz
32 bit
sudo tar xvf codeblocks_17.12-1_i386_stable.tar.xz
Now in the current directory, there are many Code Blocks deb packages. We need to run the following command to install Code Blocks.
64 bit
sudo apt install ./codeblocks_17.12-1_amd64.deb ./codeblocks-common_17.12-1_all.deb ./libcodeblocks0_17.12-1_amd64.deb ./codeblocks-dev_17.12-1_amd64.deb ./codeblocks-headers_17.12-1_all.deb ./*wx*.deb
32 bit
sudo apt install ./codeblocks_17.12-1_i386.deb ./codeblocks-common_17.12-1_all.deb ./libcodeblocks0_17.12-1_i386.deb ./codeblocks-dev_17.12-1_i386.deb ./codeblocks-headers_17.12-1_all.deb ./*wx*.deb
Once installed, you can start Code Blocks IDE from Unity Dash or your preferred app launcher.
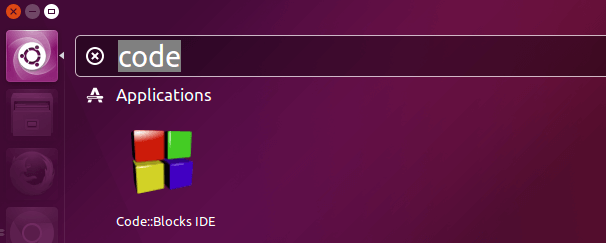
install code blocks ubuntu 16.04

Choosing a C Compiler

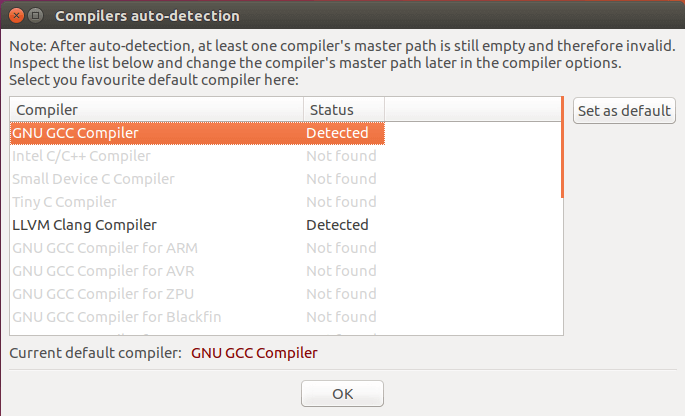
Upon first launch of Code Blocks, you will be prompted with a Compilers auto-detection window:
c compiler
Tow popular open-source C compilers available for Linux are:
  • GNU C Compiler – the defacto-standard open-source C compiler
  • Clang – Clang is much faster and uses far less memory than GCC and it provides extremely clear and concise diagnostics (error and warning messages).
To install gcc, run:
sudo apt install gcc
To install the Clang compiler:
sudo apt install clang
If you want to compile native Windows binaries on Linux, then you can install the mingw-w64 package.
sudo apt install mingw-w64
After choosing your default C compiler, you can start using Code Blocks to write programs.
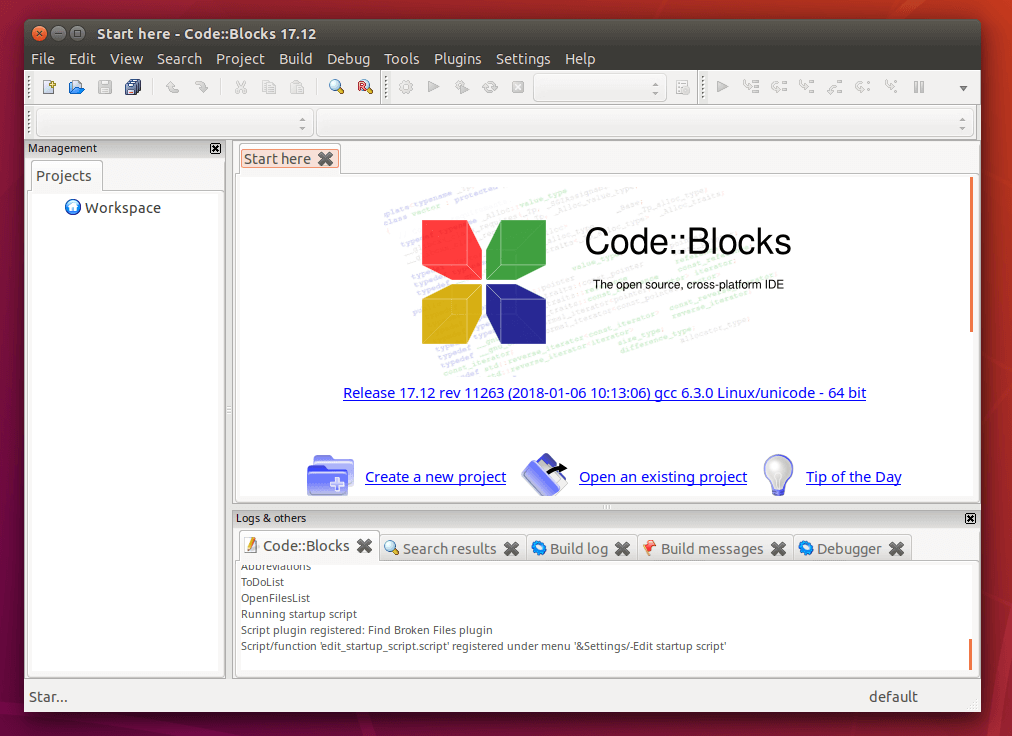
ubuntu-code-blocks-setup-17-12
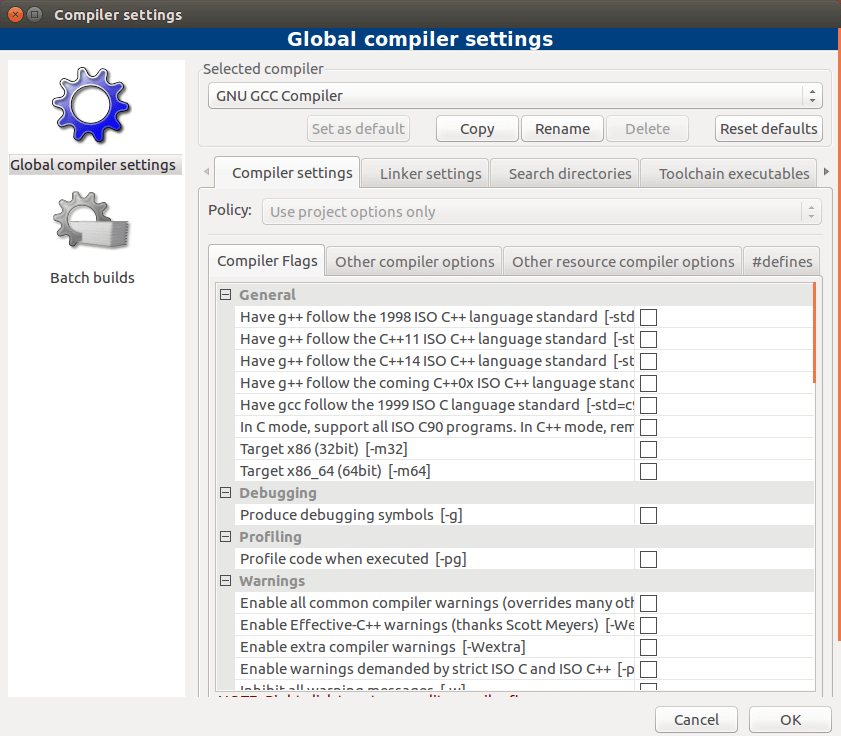
You can also choose your default compiler by going to Settings > Compiler > Global Compiler Settings.
codeblocks ubuntu
That’s it! I hope this tutorial helped you install Code Blocks on Ubuntu 16.04/Ubuntu 18.04, 19.04.

Monday, 2 March 2020

How to set Protobuf include and library path in cmake

'-DPROTOBUF_INCLUDE_DIR=/home/user/anaconda3/pkgs/libprotobuf-3.11.2-hd408876_0/include/google/protobuf/',
               
'-DPROTOBUF_LIBRARY=/home/user/anaconda3/pkgs/libprotobuf-3.11.2-hd408876_0/lib/',

How to make a symbolic link?

sudo ln -s source target

e.g.:-

sudo ln /temp/abc.so /tmp/abc.so